Welcome to the third and final part in this series of watch photography post-production & retouching posts. In Part 1 and Part 2 of this series we’ve shown our post production workflow from RAW images straight out of the camera through to the final image. If you’ve not yet seen it, then why not have a read through & watch the video it before moving on this final part?
This post shows the post-production and editing of the rear view of a luxury watch from Quinton Shaw.
All of the images covered in these blog posts were created to be incorporated into the product page on the manufacturers website. Rears views are not always that exciting, but these watches have beautiful rear plates and we wanted to show them off at their very best.
Background
The client brief was to create clean and consistent images to be used on the product page on the manufacturers website for luxury watches. The concept was to combine three images allowing clients to seamlessly scroll between three images to give a much more accurate view of the product. This approach is very similar to producing 360 spins of the product and providing this level of customer interaction has proven to increase sales conversions when shopping online.
RETOUCHING
RAW image processing
The second image underwent the same RAW processing in Adobe Lightroom as shown in the first video. We’ve included it here again for completeness. In this stage, minor exposure and contrast adjustments are made to ensure that we have optimal images to continue retouching in Photoshop. The adjusted RAW files are exported as 16bit .tif files ready to be retouched in Photoshop. There is very little other work performed and the .tif files are used to carry out all of the retouching and create the final image.
Retouching in Photoshop
The basic workflow for retouching this image is to cut it out from the background before moving on to image retouching. If you’re not already friends with the Pen tool, you most certainly will be after a job like this! This extremely powerful tool is perfect for producing accurate and consistent as well as editable cut-outs. If you’re looking for an easy to follow tutorial on using then Pen tool, then I would highly recommend this onefrom Aaron Nace at Phlearn – it’s packed full of information and Aaron’s super smooth tutorials are always jam-packed full of information!
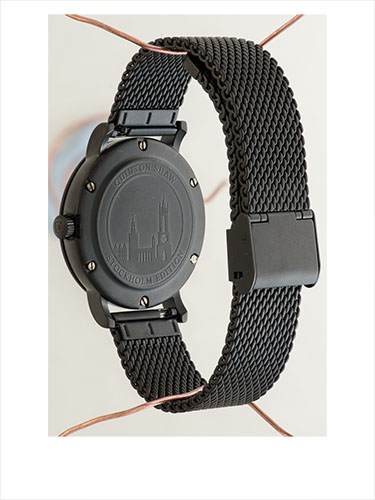
As you will see from the video, this rear image of the watch has additional areas that need to be outlined using the Pen tool around the inside edges of the strap. This is about as difficult as a standard watch strap can be due to the small individual links. However, the effort is worth it as the subject can easily be placed on to any digital background once cut out.
Cleaning:
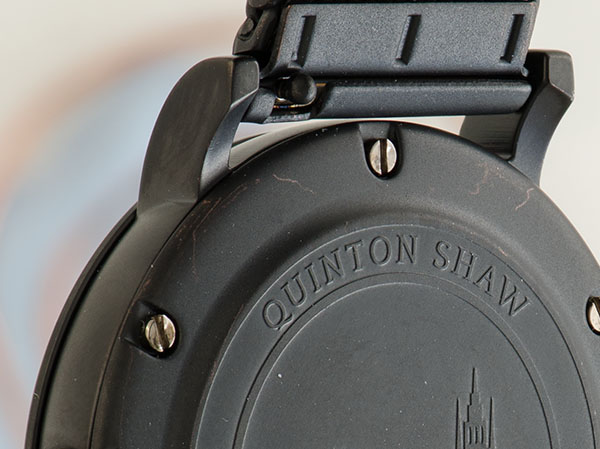
Once again, with the watch cut out, the next step is to clean all dust and marks from the surface. Even though these watches were provided to us in protective packaging and were handled only using gloves there was still dust that need removing from the surface. In particular, the rear face of the watch had a plastic protective film which, when removed, left a slight residue on the matt black finish. This had to be cleaned before the watch was shot and even then, a small amount of further cleaning was required during retouching.
Due to the angle at which this watch was shot, there were some areas around the edges of the strap in which the white background was visible. These were removed using the Healing Brush tool to ensure that there is no white visible which would look out of place when the watch was added to a coloured digital background. Attention to this level of detail is important for product photographers and we take great pride in creating images with care and precision.
The wires that were used to hold the watches whilst shooting them added a small number of tiny marks on the rear surfaces of the watch which need to be removed. In addition the pieces of wire used to hold the watch in the correct position whilst shooting were also removed. This was achieved by copying similar sections of strap from nearby on to a new layer and transforming them using the Warp transform tool. The edges were adjusted and blended to match to the existing strap using the Clone Stamp Tool.
Contrast and Detail
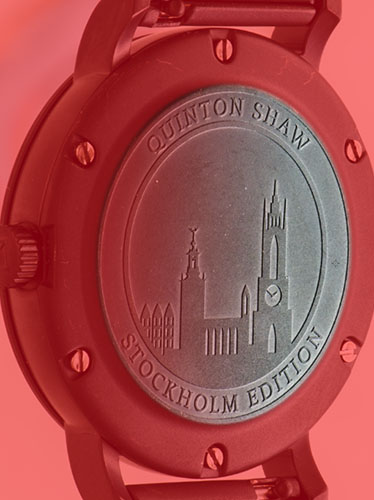
As there are no highly reflective surfaces on the rear of the watch there was a little less work required once the cleaning was complete – although, there was more cleaning to carry out! Great care was taken when shooting this watch to make sure that as much of the detail in the engraving on the rear of the watch was highlighted as possible. This was achieved by placing a light on the right hand side of the watch at an oblique angle. This produces shadows on the left edge of all of the raised features which adds definition and a feeling of depth.
I’d always envisioned a gradient in the lighting across the rear face and the lighting setup was built with this in mind. However, it wasn’t possible to get the strength of gradient that I wanted in the same shot as the rest of the watch. Effective gradients on small surfaces are near impossible to shoot when lighting and shooting the image in one shot. If this was a hero image I would have created the gradient in one image and lit the other aspects of the watch in numerous other images and combined them in post. But this is just one of a series of 8 watches that were shot at the same time and the clients budget did’t stretch to complicated and time consuming composite images.
Working in this way there is no reliance upon post production to fix and correct shooting errors, we just keep shooting until we get the best image we can. This also means that there is less time spent in post production! However, in this case the reduction in contrast was unavoidable. Therefore, we needed to boost the contrast using several Curves layers with layer masks to ensure that the changes are only applied to the face and features as required. Various Selection tools were used to create a clean selection that changed the area of detail that we wanted and on an image with simple colours as this one, the Color Select tool was very effective.
You can also watch the video on YouTube hereand also subscribe to keep up to date with any future videos!
So there we have it… You’ve been through our full retouching workflow of three images that were provided to the client!
As you can see from the images below, other than the change of background and straightening the watch there are very few visible differences when the images are viewed at this size. This is because we worked hard to ensure that the image was created as much as possible in-camera… This is why we are primarily photographers and use retouching to add the finishing touches to images rather than relying on in to make up for deficiencies during shooting.

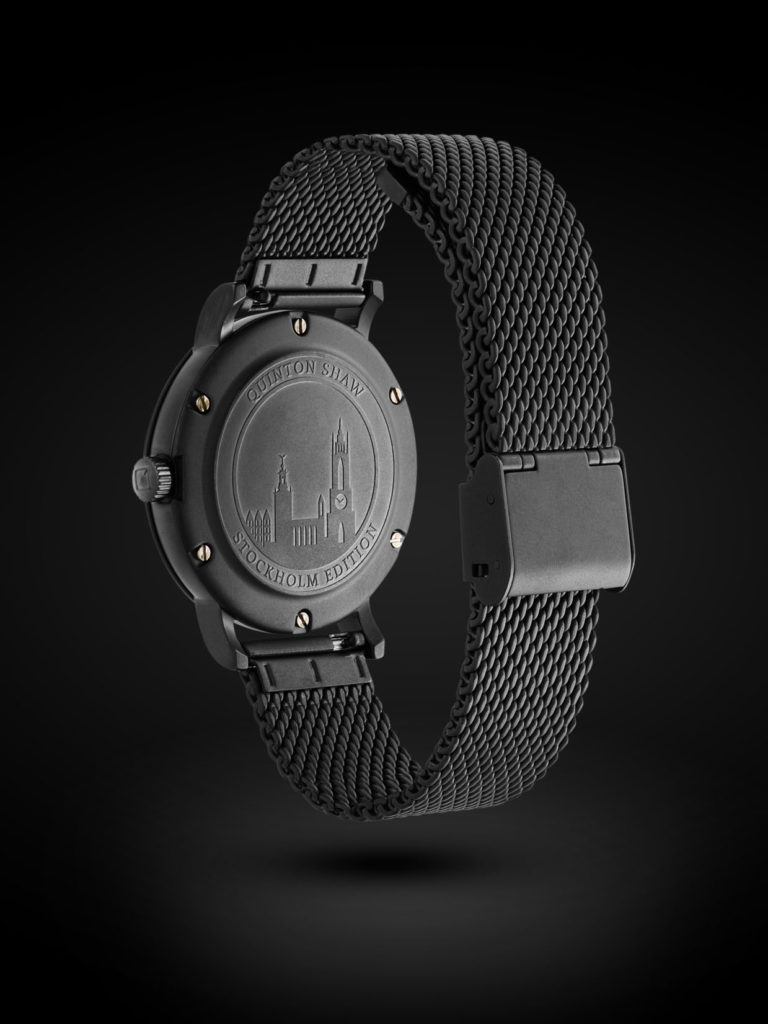
Final image:
Once again the edited final image was provided to the client without a background as requested. Therefore, we added a simple digital background that reflects and compliments the stylish simplicity of the design of the watch. The background is simply a plain coloured black background with a radial gradient behind the watch and another, slightly darker one beneath the watch. The drop shadow is simply a single brush stroke from a soft edged brush that has been reduced in height vertically – it’s simple, yet effective!
New videos coming soon!
After a lot of work our new studio space is operational and we’re using it to shoot all manner of different projects. If you want to see more of our work then subscribe to our YouTube channel and we look forward to hearing your thoughts on our videos!
Sharing is Caring!
We hope that you’ve found this post interesting and helpful in understanding that retouching in product and advertising photographs does not have to distort reality. It can be used to make small and relatively subtle changes that highlight and refine a product.
I’d love to hear your comments or views on any of the topics covered above so feel free to enter them down below!